Thursday, January 30th, 2014...3:40 pm
Tarting Up the Year of the Horse
Since moving to Hong Kong back in 2008, I’ve not been back to Singapore for Chinese New Year – my family isn’t terribly traditional, flights are ridiculously expensive around these peak periods, and I generally see my family enough that they don’t make a fuss if I miss occasions like these. However, that means that apart from the odd box of cookies that gets smuggled back into Hong Kong by whichever friend that has completely overdosed on binge eating back home and hence doesn’t want any for themselves, I haven’t really had too many of our traditional CNY snacks in the last 5 years.
The two things I tend to miss the most are bak kwa and pineapple tarts. A couple of years ago, I got it into my head that I would make bak kwa – best described as a sweet, moreish, charcoal toasted, chewy-with-crispy-blackened-edges Chinese pork jerky. But it’s still not quite happened, potentially because bak kwa is one of the easier things to transport back to Hong Kong, and I normally get my hands on some a couple times a year anyway.
Another thing which I realised in the lead up to CNY this year, is that Hong Kong folk, privy as they are to many delicious delights all year round, really pale in comparison to Singaporeans when it comes to their enthusiasm for CNY goodies. Which makes sense, seeing as these crazy people seem to think Ferrero Rocher ranks up there with CNY treats! (Don’t get me wrong – I love rocher like you wouldn’t believe, but there are so many tastier and thematically more appropriate ways to over indulge over CNY.) Most of my local friends are only familiar with bak kwa because they’ve tried them in one of their Singaporean friends’ houses, and my desperate attempts at describing a sugee cookie only met with blank stares. In fact, it was only about a week ago that I realised most of the HKers who seemed to recognise the term “pineapple tart” were in fact thinking of the (VASTLY INFERIOR, in my opinion) Taiwanese pineapple cake – a pastry which sounds like a really similar concept (pineapple jam encased in pastry) but tastes nothing like Singaporean pineapple tarts.
Which is how it came to pass that this year, my friend E got roped into a weekend of slave labour and our very own sweatshop of a pineapple tart production line. We both made a portion each of the jammy pineapple filling: E went with a lightly spiced version, fragrant with cinnamon and clove, and I went plain, and then joined forces to assemble and bake the pastries in front of the TV. We also ended up comparing two preparation styles – I puréed my pineapples mechanically, and she went old school, grating the fruit by hand. In the end, we really enjoyed the flavour of both types of filling, but I’m pleased to report that the supposedly fussy pineapple tart connoisseurs we handed our tarts out to couldn’t really tell the difference in texture between the hand-grated and mechanically-blitzed filling.
Depending on the size (and water content) of your pineapples, you should get somewhere between 50-75 portions of pineapple filling. Adjust the amount of pastry you make accordingly – the recipe I’ve provided below makes enough for just over 50, or potentially up to about 60 if you roll the pastry very thinly and collect the excess scraps of dough to make more pastry. The good thing about this dough is that it’s really easy to handle – it isn’t sticky or the sort that doesn’t stand up to being manhandled. It’s difficult to scale the recipe down any more from this, unless you want to be left with half an egg yolk of leftovers, but we also ended up making a couple of random peanut butter and speculoos spread filled tarts with the leftover bits of pastry. (Or freeze it for next time!)
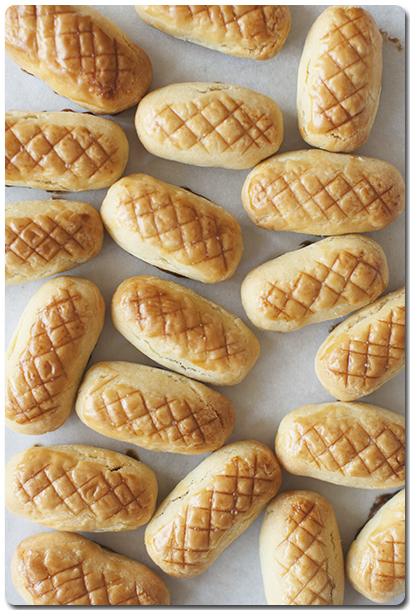
And for a first ever attempt at pineapple tarts, I have to say I’m quite pleased with how they turned out. So if any of you reading this are homesick Singaporeans, or if you’re bored over the long weekend and find your house bereft of pineapple tarts, rope in some unsuspecting friends or family members, put on a movie, and barter a handful of pineapple tarts for an afternoon of rolling and baking. :)

Oh, and by the way, thank you to everyone for the well-wishes and for keeping Rufus in your thoughts. The little prince is more or less fully recovered from his surgery, his bald patches are starting to re-fuzz, he is feeling much better (ie putting up a much bigger fight when it’s medicine time every morning), and would like to wish all of you a happy and prosperous year of the horse. He especially loves this year ‘cos he’s learnt to make some rather horse-like noises. Kung hei fatt choy!
Enclosed Pineapple Tarts
(Very slightly modified from Nasi Lemak Lover’s recipe)
2 ripe pineapples
around 200g caster sugar
1/4 tsp fine sea salt
175g unsalted butter, at room temperature
60g sweetened condensed milk
1/2 tsp fine sea salt
255g all-purpose flour
1 large egg yolk
1 large egg yolk
1 tbsp milk
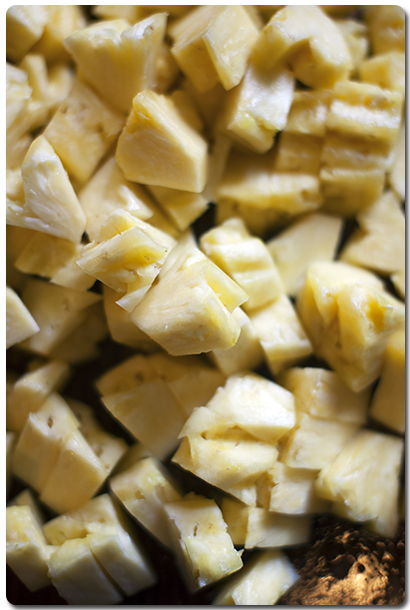
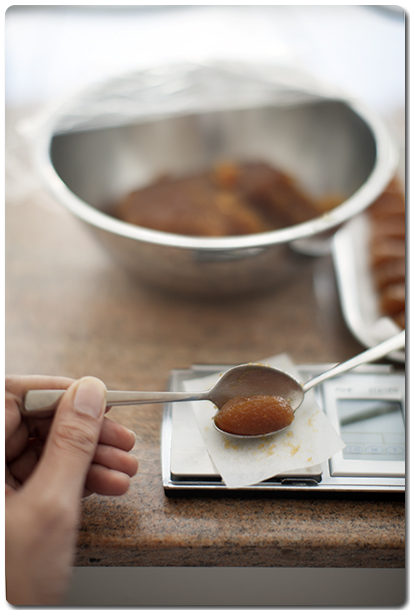
To prepare the pineapple filling: peel, core and remove the eyes from the pineapples. Weigh the flesh – depending on how ripe and sweet your pineapples are, and how sweet you like your pineapple tarts, you’ll probably need somewhere between 150-250g of caster sugar per kg of pineapple flesh. (Two pineapples gave me 1.4kg of pineapple flesh and I ended up using about 200g of sugar in total, which gave me a mildly sweet but slightly tangy filling.)
Roughly chop the pineapple flesh and purée it in a blender or food processor. Tip this all into a wok or a large, deep-sided sauté pan, add the sugar and salt, and bring to a gentle boil over medium-low heat. Cook, stirring frequently, until the liquid completely reduces and the mixture caramelises and turns from a pale yellow slush to a deep amber/golden brown paste, about 1 hour. Remove from heat and allow to cool completely.
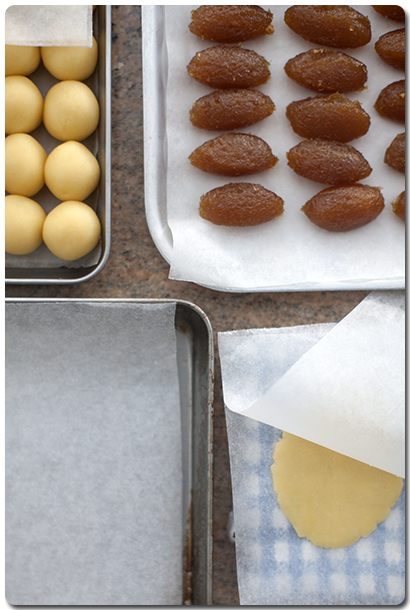
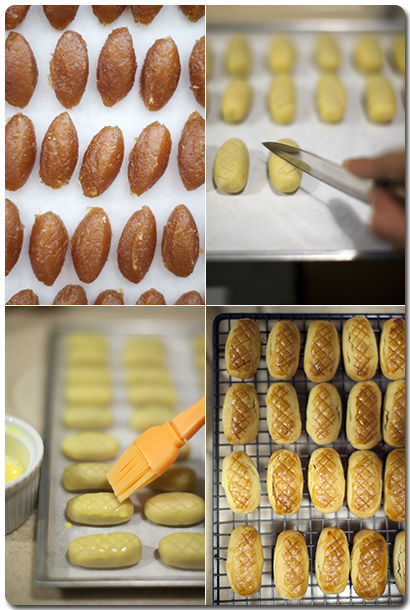
Once it has cooled enough to handle, divide the pineapple filling into 8g pieces and roll into capsule-shaped lumps (or into balls, depending on what shape you want your final pastries to take), and lay them on a tray lined with greaseproof paper. The pineapple filling can be prepared up to 2 days in advance and stored, well-wrapped, in the fridge. I imagine it should freeze pretty well too, but just make sure you wrap it really well.
To prepare the pastry: cream the butter, condensed milk and salt together with the paddle attachment of your stand mixer until pale and fluffy, about 5 minutes on medium-high speed, scraping down the sides of the bowl as necessary. Scrape down the sides of the bowl, and add the egg yolk, beating on medium-high for 1 minute. (If you are making more than one portion of dough, add the egg yolks in one at a time, beating for 1 minute and scraping down the sides of the bowl between additions.) Reduce the speed to low, and add the flour to the butter mixture in two additions, until it comes together in a soft, pliable dough. It should not be sticky and should come away from the sides of the bowl cleanly.
Divide the dough into 9-10g portions and roll them into balls. (The portioned out dough will also keep, well-wrapped in the fridge, for a day or two. I actually found the cold dough slightly easier to handle.)
Preheat your oven to 165C and line two baking sheets with greaseproof paper.
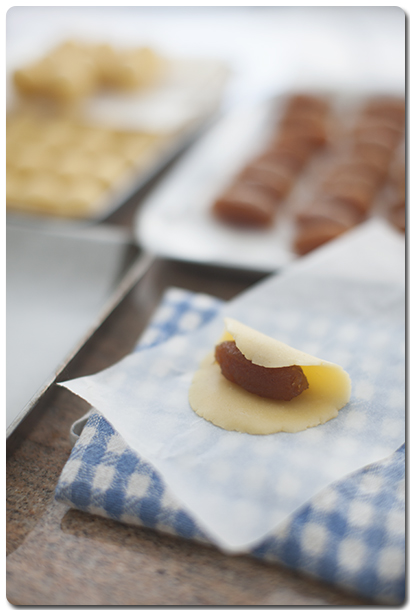
To assemble the pastries, flatten each dough ball between two pieces of greaseproof paper into a roughly oval shape about 1-2mm thick. I used my surigoki in lieu of a proper rolling pin/dowel and that worked great, or you can just flatten it between your hands.) Place a piece of the pineapple filling in the middle and enclose it with the dough, gently pinching the edges to seal. If there is any excess dough, pinch it off and collect all the excess to form more dough balls.
If desired, you can score the tops of the pastry with a pastry cutter or a paring knife to decorate. Repeat with all the dough and filling. The prepared pastries can also be done in advance and will keep, well wrapped in the fridge, for 1 day. (If refrigerating, just bake them cold and add an extra minute or two to the cooking time.)
Beat the egg yolk and milk together for your egg wash. Place the decorated pastries about 1cm apart on your prepared trays, brush the tops with egg wash, and bake for 22-24 minutes or until lightly golden brown, rotating halfway through the baking time.
Transfer to a wire rack and allow to cool completely before storing. Baked pineapple tarts will keep for about a week in an airtight container at room temperature, but good luck with making them last that long. :D
Yield: Makes about 50-60 tarts


1 Comment
June 16th, 2014 at 11:43 am
[…] Tarting Up the Year of the Horse […]
Leave a Reply