Saturday, September 30th, 2017...9:09 pm
Meal Prep Mania
Let’s talk meal prep. We all know the story – nutrition is 80% of the battle. But what happens when you get home too late/tired to make dinner every night, or there aren’t any good diet-compliant options around the office for lunch? For those of you who follow me on IG, you probably know by now that I’ve recently been dabbling in meal prep. The previous Sunday was my first attempt, ever, but I decided to step my game up a little last weekend and document as much of it as I could so I could write about it a little more here.
I had a couple of conversations after my first attempt with people who were interested in getting into meal prepping, but didn’t know how, or where to start, or if they could do it. So, partly because I’m a ridiculously competitive person (mostly with myself, lolweep), I decided to set a few constraints for this weekend’s prep session. I limited myself to the use of two burners, a rice cooker, a medium-sized lidded saucepan, a small skillet, and a scale as my cooking tools. (I also used a cutting board, chef’s knife, and various mixing bowls, strainers, and some spoons and a spatula, but nothing a very basically equipped kitchen shouldn’t have.) No oven, no immersion circulator, no blenders or other gadgets to give me an extra edge. And I managed to shave 15 minutes off last week’s prep time! So it just goes to show: anyone can meal prep, even in a small and basic kitchen, and a little time.
This post is also gonna be a little bit different from my regular recipe posts – it’s mostly to give you guys a rundown of how I did the prep. Depending on what you cook your timing and sequence might change, but before I did my first prep I know one of the things that made me apprehensive was not really knowing what to expect and how to go about it. General batch cooking I can do with one hand tied my back, but for some reason the idea of doing this with macros had me a little bit flummoxed. One thing that definitely helps me is that I’m only prepping 2 meals per day (lunch and dinner), so that gives me a bit more flexibility to adjust for the difference in my carb and fat targets between training and rest days. I also don’t use different protein options based on those targets (I have more fat allowance on rest days, so proteins with higher tag-along fat like salmon and whole eggs are easier to fit in then.)
Some notes: depending on your goals, you’ll probably need different amounts of each ingredient, so while I’ve mentioned some amounts of ingredients, bear in mind that this plan was specifically for my targets. If you don’t track macros, and are just trying to figure out how to meal prep without having to spend an entire day in the kitchen, then I also wouldn’t bother with weighing stuff out while portioning to get everything as exactly divided as possible either. I weigh all the ingredients that I use in their uncooked state where possible, because I find that much more accurate (grains and legumes can absorb different amounts of liquid, proteins can lose different amounts of moisture as well depending on how thoroughly you cook them), but I don’t measure free veggies, so I’ll eyeball those.
And with that, let’s get started!
How to Meal Prep
Day before:
- plan out your meals – figure out how many meals you’re prepping for, what each dish will have, how much variety you want in your packed meals, and the macros per meal, if applicable
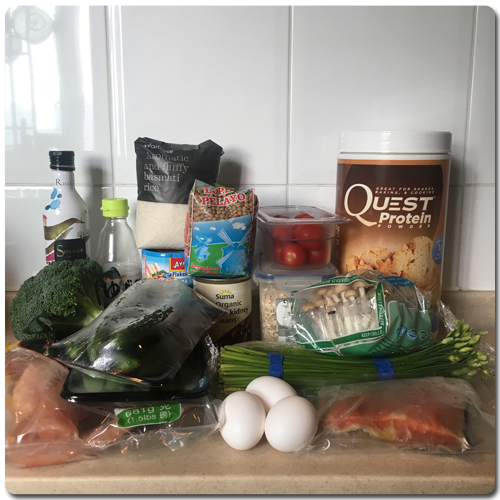
- buy produce (vegetables, fruit, herbs etc), any other staples (tinned tuna, eggs, grains, legumes)
- defrost any frozen proteins (chicken, salmon)
D-DAY:
- Weigh out, wash and soak rice
- Prep any veg (shimeji mushrooms) going into the rice cooker. Weigh out chicken breast (1 x 400g, 1 x 200g) and lentils. Keep chicken covered and refrigerated until you’re ready to cook.
- Combine rice, veg and desired seasonings (soy sauce + salt) with water, reducing amount of total liquid to account for moisture that will be released by the vegetables.
- Bring a kettle of water to the boil. Prep aromatics for lentils (a few cloves of garlic + bay leaf – you don’t have to peel the garlic, but I don’t like fishing the papery skins out after so I just smash the cloves with the flat of my knife and peel them).
- Start lentils cooking (START TIMER – 20 minutes for green lentils at a simmer works for me). Stick your eggs (4 for me, though I actually forgot one so I had to do the last one again at the end) into the same pot so it can cook together. My eggs were going into the lentil salad anyway, so I don’t mind if they taste a bit lentil-y. (START EGG TIMER – 10 min for large eggs from the fridge into boiling water for hard cooked.)
- Prep the rest of your veg! For today: chopped garlic chives (to be steamed and mixed into rice), trimmed broccoli into florets and stems into coins (to be steamed and packed into rice boxes), tomatoes, cucumber and scallion (for the grain bowls). Remember to wash your cutting board and knife before prepping any veg that won’t be cooked.
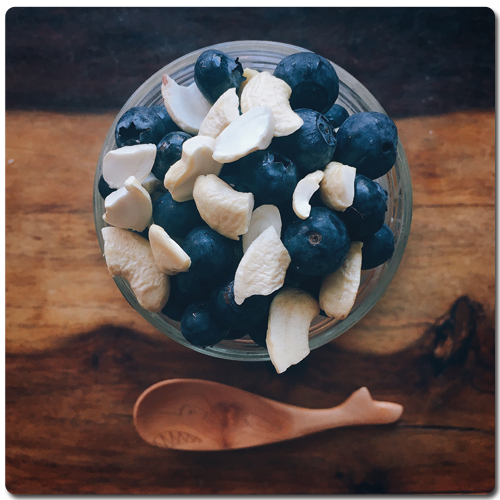
- Remove the eggs to an ice bath once they’re done. Measure out the oatmeal and whey protein (I use Quest peanut butter whey ‘cos PB oatmeal is bomb, but I don’t like how much of my fat allowance I’d have to use up in order to get adequate PB flavrs.) for tomorrow’s overnight oats. Wash blueberries, divide into 2 x 50g portions, refrigerate. Drain lentils and remove aromats (you can leave the garlic if you want, but I just pick everything out), season with salt while still warm.
- Steam-fry garlic chives (I just use a little water and salt in the bottom of the pan), drain. Steam-fry broccoli, drain. Peel eggs.
- Poach 200g chicken breast in salted water. Cut up 400g chicken breast, mix with salt and curry powder, sauté in 8g neutral oil. (This was the only time I had 2 things going at the same time on the stove.) When poached chicken is done, drain, and shred once it’s cool enough to handle.
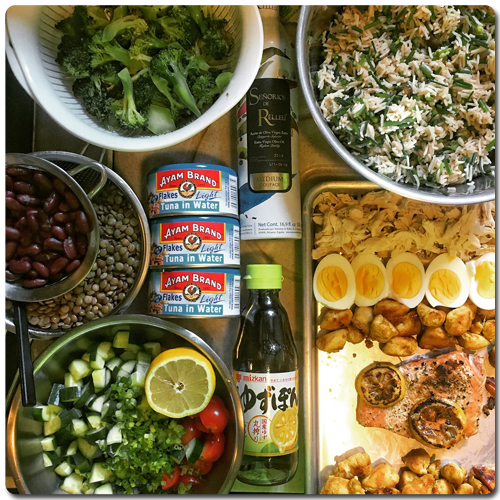
- Cook (200g coho) salmon, seasoned with salt and lots of black pepper, in 5g olive oil (a nonstick pan means you need less cooking oil, especially for delicate proteins like fish), grilling 2 slices of lemon alongside. Remove all proteins to a clean tray, in divided portions. Open can of kidney beans, rinse thoroughly, drain.
- WASH UP, you’re now done cooking and it’s time to get assembling/packing! Washing as you go, especially when you have a bit of downtime while you’re waiting for stuff to happen will drastically reduce the giant pile of dishes waiting for you at the end, and keeps the kitchen hygienic. It’ll also preserve your sanity if your kitchen space is limited.
- Empty rice into a large mixing bowl, add cooked garlic chives. Break up any clumps, mix evenly, and if desired weigh total so you can divide evenly.
- Assemble rice boxes: divide rice evenly between 3 containers, stick sautéed chicken in two boxes, salmon in one. Divide broccoli between the three containers. Cover. WASH UP.
- Wash all the dishes, fish the last egg out a little too early, cool and peel it, and top off your rest day grain bowl. Wash that last saucepan.
- Take a bunch of photos, label your boxes neatly, crow excitedly to all your friends and all over social media that you did it \o/ and then keep the boxes in the fridge.
Assemble grain bowls: divide lentils evenly between 3 small mixing bowls. Divide kidney beans between 3 bowls. Open 2 tins of tuna, drain, add to two of the bowls. Add poached, shredded chicken to the last. Weigh out appropriate extra virgin olive oil and yuzu ponzu per bowl (30g ponzu + 9g oil for the tuna bowls, 15g ponzu and 10g oil for the chicken bowl). Cut up eggs, add 1 to each bowl. Realise you forgot a second egg for the chicken bowl, hurriedly start that cooking. Mix up all the vegetables, divide evenly between the three bowls, toss and box up each salad.
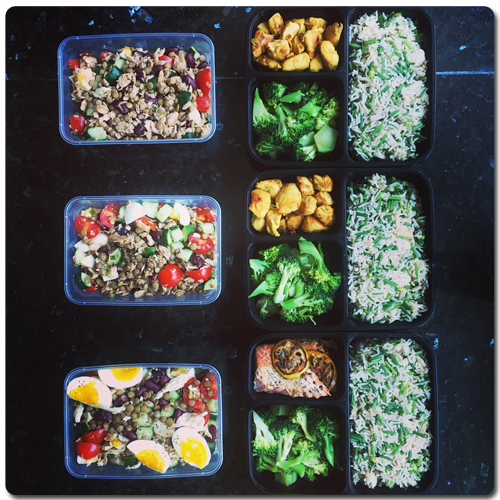
All this gave me 3 days (2 training, 1 rest) of lunches and dinners, with the following menu:
- 2 x tuna & egg lentil and red kidney bean yuzu ponzu salad bowls: 44P/26C/16F (424 cal)
- 2 x sautéed curried chicken breast and broccoli with shimeji-garlic chive basmati rice boxes: 54P/61C/7F (523 cal)
- 1 x poached chicken & egg lentil and red kidney bean yuzu ponzu salad bowls: 67P/24C/23F (571 cal)
- 1 x lemon grilled coho salmon & broccoli with shimeji-garlic chive basmati rice box: 52P/61C/18F (614 cal)
- 1 x overnight PB protein oats (to be served with cashews and blueberries): 39P/62C/13F (473 cal)
I prefer just prepping 3 days of meals, which leaves me with more flexibility should I have any social plans involving food later in the week, but this plan can easily be adapted for say 5 days worth of lunches, or 5 full days of lunches and dinners. Do note: if you’re planning to keep food for more than 3 days, it’s generally advisable to freeze the prepped food instead of storing it in the fridge (I would fridge days 1 and 2, freeze the rest, and just take the next day’s food out each night). I also would NOT recommend soft-cooking eggs to be kept at length in the fridge, but I forgot one last egg (I have 2 eggs in the rest day grain salad) and rushed it a little when cooking it at the end. You could also prep all 3 days’ worth of overnight oats at once, but I’ve got limited fridge space, so I’m happy to take a minute each night to mix it up and stick the jar in the fridge for the next day.
And that’s it! I know it seems like a long list, but from start to finish, including forgetting one egg, all of my prep, cooking, assembly, packing and washing all of my dishes, I was done today in 2 hours at 36 minutes, i.e. well before lunchtime. I’ve also included a little video below (which I downloaded from my IG stories) showing the entire process, some tips, and some of my usual cooking shenanigans. Hopefully any of you who might have been wondering how on earth one goes about meal prepping might find this helpful, and if you do give it a shot, or if you have any questions on how to adapt this plan for a different menu you have in mind, I’d love to hear from you. :)


Leave a Reply