Wednesday, August 25th, 2010...3:13 pm
Jam Sessions
I’ve been making my own jam for a couple of years now. I don’t do this on a regular basis (though I really should!), and I definitely don’t make jam nearly as often as I would like to. But every now and then I’ll come across a glut of beautiful fruit that I won’t be able to avoid buying by the crate, then there’s nothing to do but cook it down into jam and bottle it up.
Making jam is much easier than many people realise – whenever I make a new batch and hand out samples to my friends, I am invariably met with shock – What?! You made your own jam?! – or confusion – How on earth does one make jam? Doesn’t it take forever?! – and while that’s all well and good for my ego, it really isn’t that difficult. One friend recently told me that she’s always wanted to try making jam, only she was worried by how complicated it seemed to be to sterilize jars and canning equipment. Thing is – you don’t need to bottle it for it to be jam. Sterilizing your containers and canning the jam just allows you to keep it longer and prevents you from losing precious fridge space, but you could always just keep the jam in a container in your fridge.
The easiest way about it is to start out with fruit that naturally contains a high amount of pectin (the stuff that gels your jam together and gives it that jelly-like consistency), like apples, quince, gooseberries, or citrus fruits like oranges. All it takes then is peeling (or zesting) the fruit, cutting it up into little pieces or blitzing it into a puree, and cooking it down with sugar (with fruit that’s high in pectin you won’t even need to bother looking for jam sugar!) and some water until it reaches the setting point. To test for the setting point, stick a saucer or small plate into the freezer for 5-10 minutes, and plop a teaspoonful of your jam onto the cold saucer. Run your finger through it, and if it holds its trough, it’s ready. To sterilize your equipment, all you do is wash it thoroughly with hot, soapy water, then place the rinsed jars, open-side up, in a deep pan. Cover with boiling water and boil rapidly for 10 minutes. Lift them out with tongs and leave to drain, upside down, on a thick, clean, dish towel, and keep them warm in a low oven while you’re preparing your jam.
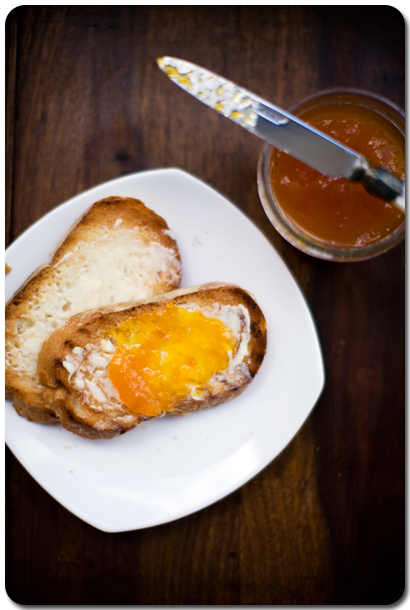
Below, I’ve provided one of my favourite jam recipes – this one’s a beautiful mandarin jam from Melissa of The Traveler’s Lunchbox. Your usual bitter marmalades have nothing on this obnoxiously vivid jam, and it’s one of the easiest I’ve ever made. And there’s really nothing like having a lazy Sunday brunch in your balcony, with crusty toast (or home-baked bread!) smeared with freshly churned butter, and topped with jam you made all on your own.
The only thing to note is that this jam is so delicious, you’re gonna run out of it in no time. So do yourself a favour, stock up on some fresh lids, wash those bottles out, and double (or even triple) this recipe. Trust me – you won’t be the only one sneaking spoonfuls of it when you think no one else is looking.
Mandarin Jam
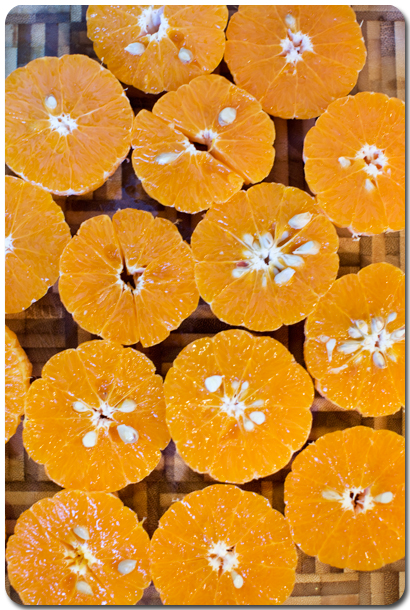
1kg mandarins (about 8-10, depending on size)
400-600g caster sugar
juice of 2-3 lemons
Wash and finely zest half your mandarins, reserving the zest. Peel all the fruit, removing as much of the white pith as possible. Cut each mandarin across the equator and dig out the pips, working over a bowl to catch the juices. Wrap all the pips up in a square of cheesecloth, tying the ends together firmly. (Using the seeds will give you the maximum amount of pectin in your jam.)
Place the halves along with any juice you’ve collected into a food processor, and blitz until you’ve got a puree, 1-2 minutes. Taste the puree, and add an appropriate amount of sugar based on the sweetness of your fruit. If in doubt, start with a smaller amount – you can always increase the sugar content towards the end. Tip the puree, along with the reserved mandarin zest, lemon juice and sugar into a deep, heavy saucepan, stir well to combine, then add in the bag of pips, tying one end to the handle of your pot.
Bring it to a boil over medium-high heat, then reduce the heat to medium-low, and simmer, stirring occasionally, and skimming off any scum from the surface. Allow to cook until it sets, about 30-40 minutes. Taste for sweetness and acidity at this point – if it needs more sugar or lemon juice, add some at this point, and cook for a couple of extra minutes.
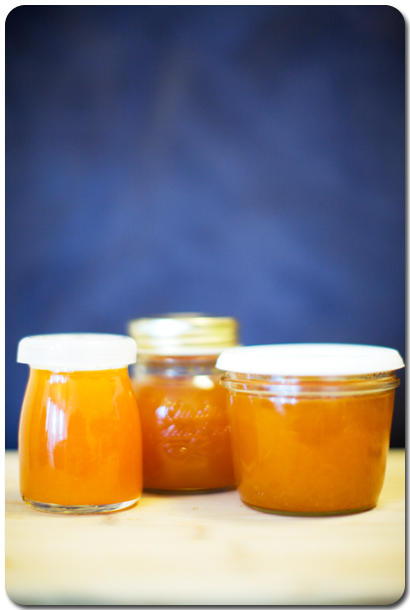
Pour into hot sterilized jars, firmly attach lids (screw top and rubber gasket lids all work just as well), and place in a deep pot of boiling water. The jars should be submerged by at least an inch. Boil rapidly for 10 minutes, then remove from the heat, dry off the bottles and allow to cool to room temperature in a cool, draught-free place. With their seals intact, bottles of jam will keep in a cool, dark place for about a year.
If you don’t wish to go through the hassle of sterilizing and sealing, simply transfer your jam into clean containers that can be tightly covered, and keep refrigerated for up to a month.


Comments are closed.