Friday, February 11th, 2011...4:02 pm
Milk Boule
I’ve been in a little bit of a cooking-rut. I’m not entirely sure how it started or when exactly this happened, but for the last couple of weeks, I’ve been starting to feel like I lost my kitchen-mojo. The first instance I remember was when I left a rib of beef in the SVS for a few hours too long (borne out of my paranoia of oversleeping and not plonking the meat into the water oven early enough for dinner), and, although it remained very much edible, the texture was just a little bit off. Kind of like a cross between pastrami and roast beef (and I don’t mean that in a good way).
Then I had a few bread-baking mishaps – No-Knead Bread not turning out at all how I would have liked (and no idea if the fault lay with me or the recipe), and my first few attempts at making this milkbread went strangely awry, thanks to an overzealous addition of random ingredients on my part, and very uncooperative yeast. (It expired, apparently. Then I bought some new yeast, and it failed to proof in warm water, the bowl of yeasty water staring balefully at me and stubbornly refusing to froth. But I tried anyway – the dry ingredients were all weighted out and mixed together already – and when it rose, I may or may not have left it to rise for too long, in too warm a spot.) Finally, I tried to make some peanutella to cheer myself up, in spite of not having any home-baked bread to spread it on, but for some reason it turned out rather clumpy and dry. It tasted pretty good, but it wasn’t the delicious, glistening, oozy spread I’d envisioned either.
But! That’s all over now – knock on wood. Before throwing in the (kitchen) towel and declaring myself officially kitchen-mojo-less, I decided to give it one last shot. I took Michael Ruhlman’s 5:3 bread ratio, swapped out about a third of the water for milk, and threw in a couple of teaspoons of sugar for a hint of sweetness. And – behold! – it felt like the kitchen gods were all smiling down upon me once again! My dough kneaded to a delightfully supple elasticity; it rose; it smelled wonderful! When I punched it down, it deflated happily, and was most amenable to being kneaded again briefly before its second rise, and subsequent baking, in a cast iron cocotte.
For those of you interested in bread-baking, baking the loaf in an enameled (or well-seasoned) cast iron Dutch oven is a great way to improve the texture of your bread, without having to invest in some high-tech steam-injection oven, or risk damaging your oven by spritzing the inside of your oven with cold water. The thick, heavy walls of the cocotte do a great job of retaining heat, and – covered for the first half of your baking time – steam in the cooking vessel, which in turn softens the outer layer of the loaf, allowing for a greater initial growth (also known as oven spring, which is the effect of the yeast’s last activity before it’s killed off by the heat of the oven), before the crust dries out and hardens.
There are two ways to go about doing this – one is to preheat your cocotte along with the oven (for about 20-30 minutes), and drop the proofed dough straight into the pan. The other is to let the dough proof directly in the Dutch oven on the second rise, and chuck the entire pot – dough and all – into your preheated oven. The upside of the first (potentially messy and slightly dangerous) method is an even greater oven spring, but I personally prefer the second method, as you don’t disrupt the structure you’ve just developed in your second rise. (Also, I’m a little prone to burning myself, and why play with fire, right?)
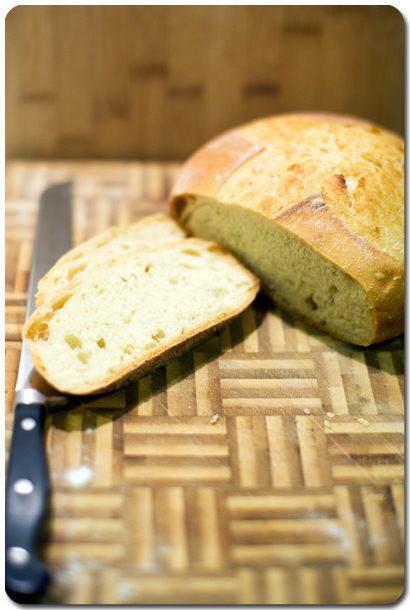
As you can see, this loaf gave me a delightfully airy (and fairly even) crumb, with a thin crust. It was fantastic fresh with a little salted butter – rather delicately straddling that bridge between tender and chewy, and it toasted up great – rendering the crust crisp and shattery once reheated – for breakfast the next morning, smeared with a spoonful of homemade blueberry jam. (Post on the blueberry jam to follow soon!) I really can’t think of a better way to have been welcomed back into my kitchen’s good favour, than with this beautiful boule. :)
Dutch Oven Milk Boule
(based on Michael Ruhlman’s Ratio – you can also find this book in my store!)
300g unbleached bread flour, plus more for dusting
5g salt
20g caster sugar
120g warm water (preferably at around 35-40ºC)
2g active dry yeast
60g whole milk
Combine the flour, salt, and sugar in a large mixing bowl.
Proof the yeast in the water, and let stand for 5-10 minutes, before combining with the milk.
Add this to the dry ingredients, and mix with your fingers or a wooden spoon till you’ve got a shaggy-ish dough. Dump the contents of the bowl onto a floured surface, roll your sleeves up, and start kneading. I like to press forward using the heel of my hand, fold the dough over and turn it 90°, then repeat. You should be going at this – dusting your hands and the surface lightly with more flour as necessary – for about 10 minutes. The dough will become smooth and elastic, and slightly tacky. Try not to add any more flour than the barest minimum to keep it from sticking, as too much flour will give you a dry dough and dense loaf.
Cut off a small bit of dough, and roll it into a ball. Gently stretch this piece between your fingers – if it can be stretched thin enough to be translucent (you should be able to just about make out the print of a newspaper through it) before tearing, congrats! Your dough has passed the windowpane test: this means long – and strong – enough gluten strands have been formed during the kneading, which will give your loaf structure, and hold up the air bubbles that the yeast creates. If it doesn’t, smush the little ball back into the rest of your dough, and knead until it passes this test.
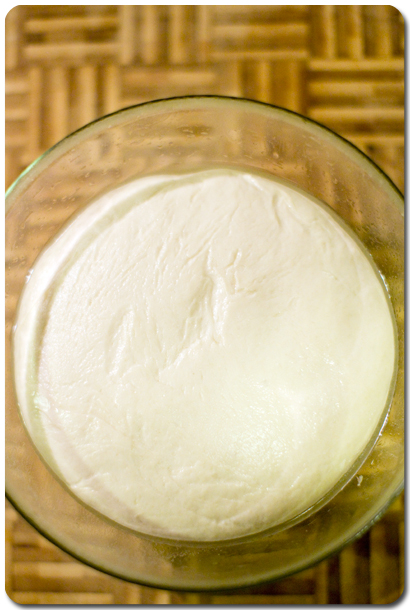
Transfer the dough into a lightly oiled bowl, cover with clingfilm, and leave to rise in a warm spot – preferably around 20-25°C. Once it has doubled in size, tip the dough back onto a floured surface, punch it down to deflate it, and knead it gently to redistribute the yeast.
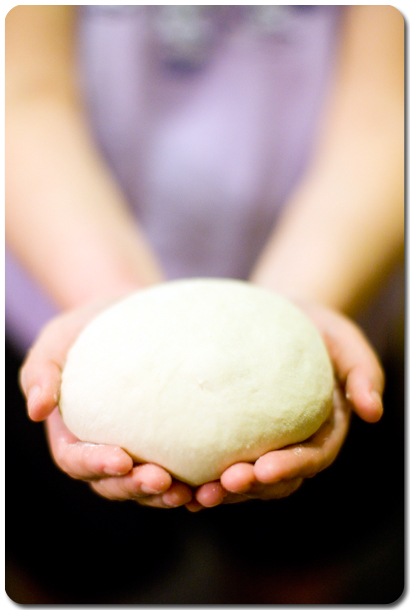
To shape the dough into a boule, gather the ends of the dough and pull them together, smoothing, tucking, and pinching the crease to form a smooth, taut surface on the opposite side. As far as my experience goes, it’s pretty much impossible to have the smooth side tight enough, so keep going at it till you’ve got a nicely formed ball. This will help the dough to rise upwards instead of spreading out during the second rise.
Dust the entire ball lightly with flour, then sit it, seam-side down, on a circle of parchment that will fit in your baking vessel. You can then either drape the loosely with a floured kitchen towel (the linen, not terry-cloth, sort), or transfer the entire thing into the Dutch oven to proof, depending on whether or not you intend to preheat the pot. Leave it to rise for about 1 hour, or until doubled.
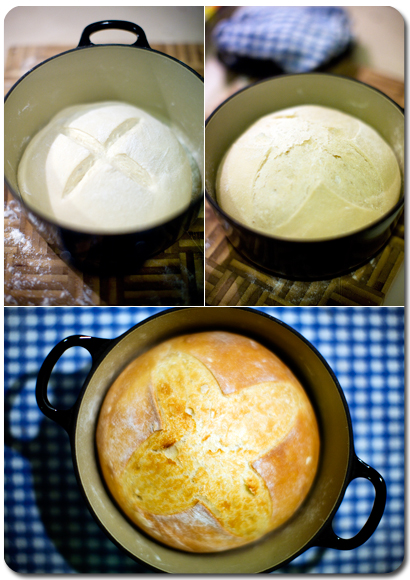
About 20-30 minutes before the second rise is done, preheat your oven to 220°C. (If you’re preheating the Dutch oven, go ahead and pop it – lid and all – into the oven too, at this point.) Once the dough is ready, slash it a couple of times with a lame (I just use a Stanley knife, lightly oiled to prevent dragging, that I keep specifically for bread-slashing.) and pop it into the oven. Cook for about 20 minutes, covered, then uncover, turn the oven down to about 175°C, and bake for an extra 20-30 minutes, rotating the pot halfway through for even browning.
To check that your bread is done, you can either tip it out of the pan and tap the bottom – you should hear a hollow thump. Alternatively, insert an instant-read thermometer into the middle of the loaf (from the side, so you don’t mar the appearance of your gorgeous boule!) and it’s done once the thermometer reads 91°C.
Remove the bread from the pan and allow to cool completely on a wire rack before slicing. This bread should keep fresh for about two days, well-wrapped, at room temperature, or you can freeze it for about 3-6 months, well-wrapped in foil. If freezing bread, I prefer to pre-slice it and freeze it (fresh) in pairs, then you can chuck the whole foil package into a low oven (about 125°C) for 15-20 minutes and you’ll have steaming bread that tastes like it’s been freshly baked. :)
Yield: Makes one small boule (about 8 inches in diameter, 5 inches high) – good for about 8 good slices of bread, plus the two crusty ends (baker’s treat!)
Note: Active dry yeast is the same as instant yeast, only it needs to be dissolved in warm water first for the spores to be activated. If you use instant/bread-machine yeast, you can substitute it with the same amount. There will be no need for you to proof the yeast, so you can just mix all the ingredients together all at once. To proof active dry yeast, stir the yeast into a small amount of warm water (the water should be around 35-40ºC, or just warm to the touch), and leave it to stand for 5-10 minutes. Once bubbles form on the surface of the water, indicating microbial activity (if none form, there’s a pretty strong chance your yeast has expired), continue with the recipe.


1 Comment
February 12th, 2011 at 3:51 pm
Great tip on the Dutch oven, I’ll try it out next week.