September 14th, 2007

Comfort Food

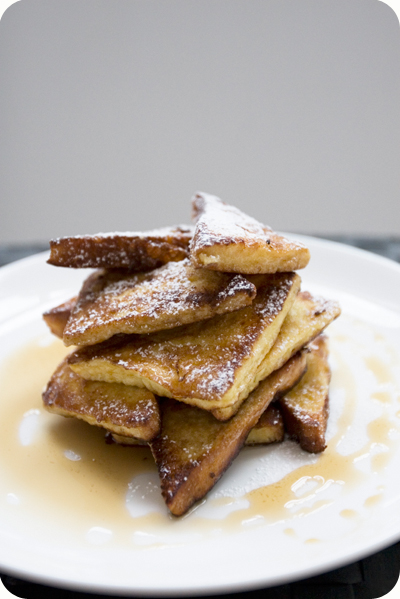
As you can see from the picture, mine’s french toast. When I was a kid, I used to badger my mom into making french toast for me every weekend – to the point that my poor brother started refusing to eat it. Soft pillow-y bread, soaked in a milky egg wash, fried to crisp perfection and served piping hot with maple syrup (or kaya, as I’ve now learnt to get my fix in Ya Kun and Killiney) – what’s not to love? I’ve always had a gigantic sweet tooth, and to be honest my love for french toast probably stemmed from my love for maple syrup.

French toast, or pain perdu (literally “lost bread”) as it is known in France and Belgium, which apparently may not even be French in origin, originated as a way to save stale bread. Bread is sliced on a bias off the hardening loaf before being dipped into the eggy mixture to soften it. I personally love using brioche, but the version that really sends me flying back to my formative years is made with thick sliced white bread, particularly Milk Bread. And instead of waiting for bread to go stale, I’ve often made trips to the convenience store for the sole purpose of buying bread to satisfy my french toast craving.

What’s your favourite comfort food? Here’s my recipe for mine. :)

French Toast

5 slices milk bread (or any other thick sliced soft white loaf)
2 large eggs
100ml full cream milk
pinch of salt
1 tbsp cinnamon sugar (or vanilla sugar)
butter for frying
maple syrup, icing sugar, kaya or jam to serve

Lightly whisk together the eggs, milk, salt and cinnamon sugar with a fork and set aside. Slice the bread diagonally into halves or quarters (I like slicing them into quarters so that I don’t need to cut them anymore after they’re cooked, and there’s more surface area for the bread to soak into).

Melt a good knob of butter into a non-stick pan over medium heat. When the butter has melted and started to froth, dip a piece of bread into the egg mixture and fry gently until golden brown, before flipping over and cooking until the other side is golden brown and crispy as well. Transfer onto a waiting plate lined with kitchen paper to drain. Repeat with remaining slices of bread, adding more butter as needed.

Once all the bread is cooked, arrange them on a plate and serve with syrup or jam on the side. You can also dust it with icing sugar. I particularly love eating this with a glass of cold milk or iced milo.

Serves 2 for breakfast, or 3-4 for a light snack.

September 10th, 2007

The End of an Era

I’m starting work soon, and as such I doubt there’ll be very much going on here. No, I’m not killing my blog off, but just warning you all of the changes to come. The main reason why I’m so sad about work starting is that I doubt I’ll have the time (nor inclination) to entertain as much as I have been for the past 8 months or so. Anyhoo, I also just threw what will probably be my last two dinner parties of the year.

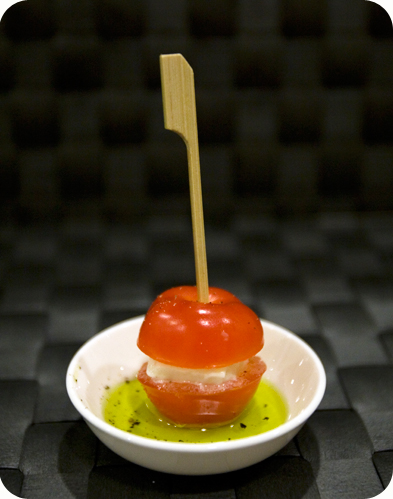
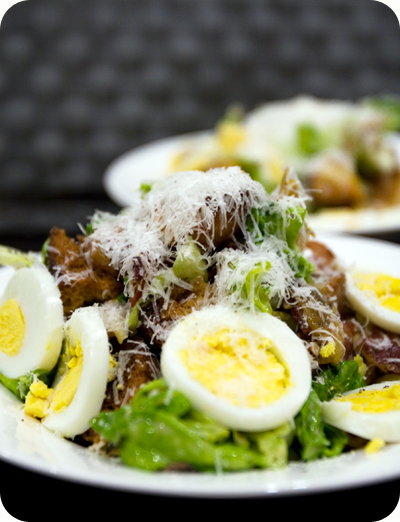
The first was for one of the bunny’s very good friends’ belated birthday dinner/present, and I let her choose her menu for the evening, which was pretty fun. The dinner was started off with a bite-sized take on the Insalata Caprese, which is one of my favourite salads of all times (pictured at the start of the post). Following which, I made (much smaller versions of the) roast chicken caesar salad.

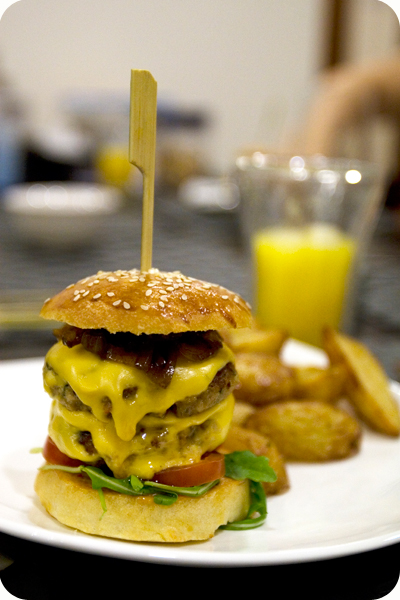
The two things that the birthday girl requested for were my burger, and my chocolate fondant (served with homemade vanilla bean ice cream). I attempted to make my own burger buns, and while they tasted pretty nice, the shape came out a little warped. I’m determined to crack the secret to burger buns before I start work! The homemade buns housed a doublecheese mini burger, which was served with a (not so) secret sauce made of japanese mayo, hot sauce, maggi chilli sauce, and some other things which I don’t really remember anymore. Oops.

Tonight, my favourite cat and S.B. came over for dinner. They had been badgering me to let on what I was preparing for the past few days, but I managed to hold out even when they arrived a couple of hours before dinner to play Wii and xbox while I finished up the preparations. The main course was a duck ragout pasta (which turned out a little watery, but still yummy), and I made double chocolate cakes for S.B. and myself, and apple crumble for the cat and the bunny; both served with my vanilla bean ice cream on the side.

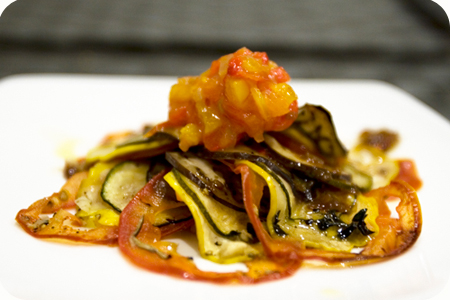
So what was the big secret? Having recently watched Pixar’s Ratatouille, I’d been feeling a bit itchy finger to try out the titular dish. Otherwise known as Confit Byaldi, Thomas Keller’s rather fussy version of the hearty vegetable stew was the one solely vegetarian dish that really had me itching to try it out. Further, I hadn’t really seen any posts on the food blogs I lurk around on any successful (or otherwise) attempts.

As you can see, my plating skills still leave something to be desired, but other than that, it was successful! And pretty darned tasty too. All 4 of us gobbled it down, gawking at how flavourful a “plain vegetable dish” had turned out to be. (We all shy away from vegetarianism, if you haven’t guessed by now.) I can’t really be bothered to type out the recipe since it’s so bloody long, but it’s easy enough to find online. In fact, I’m gonna be really generous and provide you with a couple of links (more than one in case one stops working) so I hope you try it too! It was really, really fun to make, and the reaction on our guests’ faces when they saw me coming out of the kitchen was just insanely satisfying.

Recipes for Confit Byaldi by Thomas Keller, available on dailybulletin.com, NYTimes, LA Daily News, and one extra link to Smitten Kitchen’s interpretation. Enjoy!

August 30th, 2007

Salad Night

This just goes to show that salad night isn’t necessarily a healthy event. From someone who grew up loathing salad bars (and, for that matter, vegetables in general like most children), this is indeed a welcome revelation.

Following a recipe for a caesar salad dressing from Shawn Armstrong’s Seafood: Recipes from The Cliff, and a chicken maryland-esque roast chicken and croutons idea from Jamie Oliver, I made possibly the least healthy salad ever, barring perhaps the foie gras, bacon and liver salad at L’Angelus on Club Street.

Whatever the case, it was pretty damn tasty. And if this is the only way parents will get their kids to swallow some greens, I say take it – since at least their kids will grow up knowing that just because it’s green doesn’t mean it ain’t gonna taste good.

Warm Caesar Salad
(Dressing recipe adapted Seafood: Recipes from The Cliff)

Dressing Ingredients:
10 anchovy fillets, preferably stored in olive oil
1 garlic clove, peeled and grated or minced
1 tsp dijon mustard
1 tbsp red wine vinegar
1 tbsp freshly squeezed lemon juice
1 tsp Worcestershire sauce
a small handful of finely grated Parmesan cheese
1 egg yolk
1 cup extra virgin olive oil

2 heads of baby butterhead (or any other combination of salad leaves)
2 free range eggs
20g Parmesan shavings

2 chicken legs (drumstick + thigh, or 3 chicken drumsticks)
10 sprigs of rosemary
3 garlic cloves
4 thick slices of ciabatta
olive oil
5 slices of pancetta
olive oil
sea salt and freshly ground black pepper

Preheat the oven to 180°C. Finely chop 2 sprigs of rosemary and the 3 garlic cloves. Mix with 1-2 tbsp of olive oil and season with salt and pepper to taste, then rub all over the chicken legs. Set aside for 5 minutes. Place the remaining rosemary sprigs at the bottom of a small roasting tray, tear up the ciabatta into rough chunks (roughly 2 inch cubes) and place over the rosemary. Set the chicken legs, skin side up, over the ciabatta, and roast in the oven until meat is tender and comes off the bone easily – about 50 minutes. During the course of the roasting, shift the bread around a little two or three times to ensure that the pieces around the edges don’t burn. When the chicken is almost done, lay the pancetta over it and cook until the pancetta is just crisp.

While the chicken is cooking, make the salad dressing by whizzing the egg yolk, worcestershire, vinegar, lemon juice, garlic clove, mustard, and Parmesan up. Drizzle the olive oil in until it emulsifies, and all the oil is incorporated. Set aside. (Note: this recipe makes enough for 6-8 salads of this size, so store the rest in your refrigerator for later use.)

Place the eggs in cold water in a small saucepan, bring to the boil, and simmer for 8-10 minutes, depending on the size. Drain, and refresh in cold water to stop the cooking. Peel the eggs and either cut into wedges or slice. Rinse the salad leaves, and tear or cut up the bigger ones if necessary. Spin dry.

To assemble, toss the salad leaves in about 4-6 tbsp of the dressing. Peel the chicken meat off the bone, and roughly chop, with the crispy pancetta. Scrape off any blackened bits from the croutons, and cut the bigger ones into half or slightly smaller pieces. Toss the chicken, pancetta and croutons with the salad leaves briefly, then transfer to clean, warmed plates, and place egg slices around the salad. Finish by shaving more Parmesan over the top of the salad, and sprinkle with freshly ground black pepper.

Serves 4 as a starter, or 2 greedy people for a one-plate dinner.

August 27th, 2007

Muffiny Buns

The one awesome thing I took away from my brief trip to Vietnam was a renewed love for bread. On most occasions, I categorically disagree with the saying “man cannot live by bread alone”. (Supposing my bread is filled with a variety of sausages, bacon, eggs, and spreads, of course.) Bread’s also something I love to make, and on the flight back from Vietnam, aka Asian land of the baguette, I happily jotted down various types of bread I wanted to bake upon my return.

One of the types, high up on my list, was brioche. I’ve made brioche only once before, and the stickiness of the uncooked dough quite surely scared me. Further, I was following a recipe that called for fresh yeast, which is impossible (or at least ridiculously difficult) to find in Singapore. Having checked my larder and fridge for all the necessary ingredients, I set my butter out to soften only to realise that the new recipe I was intending to try took almost 24 hours to make, start to finish. I ran for my well-worn copy of Baking Illustrated, and instead found a recipe for Parker House Rolls, whose components are not dissimilar to brioche, albeit in different proportions. It also only took 2 hours to make, from start to finish, thanks to the first rise being performed in a slightly warmed oven, and proved to be a good choice.

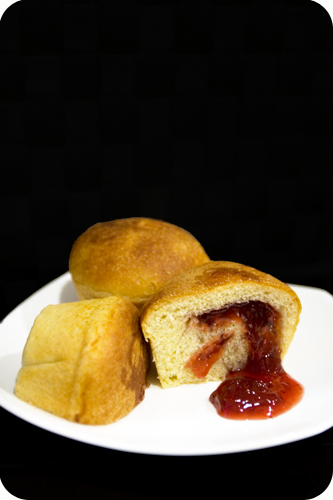
Parker House Rolls are butter, milky, soft bread rolls. Their shapes are a little reminiscent of the white chinese steamed buns used to house Kong Ba Bao, in that they’re flattened ovals, folded over, (and this is where they differ), brushed all over with melted butter, then baked to a golden-brown heavenliness. They were a huge success the first time round, so I decided to vary the recipe a little, and make breakfast buns for bunny to bring to work for the next couple of days.

One problem I found with the first batch of rolls that I made were that they were a little too flat. This was really only a problem because my favourite part was the fluffy, pale golden interiors, and it made sense that if I baked them in muffin tins this time, they’d spread less and leave a higher buttery-insides to thin crust ratio. Instead of baking them in the generic form, I filled them with a little melted butter and some jam or ham, then rolled them back into a tight ball and baked them in muffin tins. The result was heavenly.

Breakfast Buns
(adapated from Baking Illustrated’s Parker House Roll recipe)

1 1/4 cups full cream milk
2 heaped tbsp caster sugar
2 1/2 tsp active dry yeast
1 large egg, lightly beaten
4 cups unbleached all purpose flour, plus extra for dusting
1 1/2 tsp salt
14 tbsp unsalted butter, softened
24 tbsp jam or 12 paper-thin slices of ham (or a combination of the two) for the fillings
about 1-2 tsp mild-tasting oil

Adjust an oven rack to the lowest position and heave the oven to 100°C. Once the oven reaches 100°C, maintain the oven temperature for 10 minutes then turn off the heat.

Heat the milk and sugar together in a small saucepan until the mixture is lukewarm (about 45°C). Whisk in the yeast and the egg, and set aside for 5 minutes.

Combine 4 cups of the flour and the salt in the bowl of a standing mixer fitted with the dough hook and mix on low speed to blend, about 15 seconds. With the mixer running, drizzle the liquid mixture in a steady stream and mix until the flour is moistened, about 1 minute. With the mixer still running, slowly add 8 tbsp of the butter, one tbsp at a time, until incorporated into the dough. Increase the speed to medium and beat until the dough is thoroughly combined and scrappy, about 2 minutes. Continue kneading on medium speed until smooth but still sticky, about 6 minutes, adding more flour in 1 tbsp increments, if necessary for the dough to clear the sides of the bowl. (Both times, it took me about 2 tbsp of extra flour to reach this texture.) Scrape the dough out onto a lightly floured surface and knead by hand for an additional minute, until very smooth and soft, but no longer sticky. Transfer the dough to a very lightly oiled large bowl, cover with plastic wrap, and place in the warmed oven until the dough doubles in bulk, about 45 minutes.

Once the dough as doubled, press it down and replace the plastic wrap, and allow the dough to rest for 5 minutes. Meanwhile, melt half the remaining butter, and with a pastry brush, liberally butter 24 muffin tins (I use 2 x 12 capacity tins). Divide the dough into 24 pieces (each should be roughly 50-55g in weight), and with a cupped palm, roll each piece into a smooth tight ball then loosely cover with plastic wrap. It’s better to use an un-floured work surface, which will stick a little to the dough and help form a tighter ball. Repeat with the rest of the dough until you have 24 balls, ensuring that all the completed balls and remaining dough are always covered with plastic wrap so as to prevent them from drying out.

Beginning with the ball rounded first, use the palm of your hand to flatten it into a 1cm thick circle. Lightly dust both sides with flour, then roll out until it is a circle twice the diameter. Spread a little of the remaining butter in the middle, place a dollop of jam, or some shredded ham, in the middle, then gather up the edges and squeeze together to seal. (You might find it easier to use a little water/egg wash to help the edges to adhere to each other.) Round again into a tight ball using a cupped hand, and place in a the muffin tin. Repeat with the rest of the balls. Cover the trays loosely with plastic wrap, and place in a warm, draught-free place for the second rise, about 45 minutes.

Towards the end of the second rise, preheat the oven to 175°C. Brush the tops of the dough with whatever remaining melted butter you have, and bake for 12-15 minutes, rotating the pan once midway through, or until golden brown and crusty. Remove from the oven, and transfer to a wire rack to cool for 10 minutes. Serve immediately, or keep in an airtight container at room temperature for up to 3 days, and toast to reheat before serving.

Makes 24.
August 22nd, 2007

Hello & Goodbye

I’m back in Singapore, thanks to some changes in my travel itinerary. The photos from Hong Kong are all up on flickr, and I’ll get cracking on the Vietnam ones shortly.

Anyway, this post is really just to direct your attention to a new subsidiary of w&d – obsessive compulsive linking. You can read the explanation there. Hooray for tumblelogs, and I hope I keep at that one long enough this time.

So no, I’m not going anywhere. My asides, however, have been booted over to the new space. I’m in the process of tailoring this space to a more food-related site (as I’m sure most of you can see), and it’s high time I got those buggers their own crib. Alrighty-ho, I need to finish the two books I was reading! And make random noises at the wikipikicat.