Wednesday, November 7th, 2007...1:54 am
Red Velvet
That is, the cupcakes. Red Velvet Cakes have rather befuddled me for quite a while now – try as I might, I can’t really seem to find a satisfactory explanation as to why one would want such unnaturally coloured food! According to wikipedia (every student’s favourite source), the red colour first came about as a reaction between the vinegar in the cake and the cocoa powder, and following the introduction of Dutch Processed cocoa powder, red food colouring has since stepped up to enable us to recreate the deep red hue, as the increase in alkalinity results in a dramatic decrease in this colourful reaction.
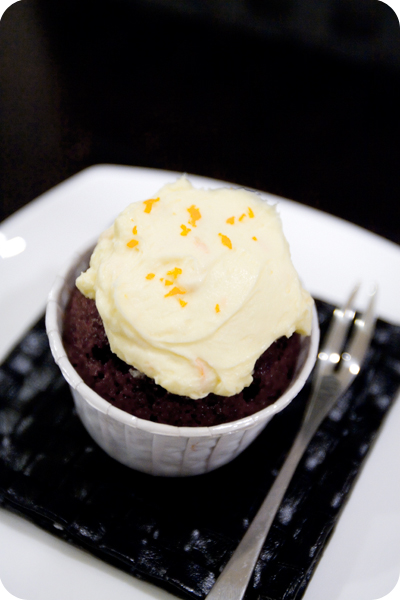
I don’t actually remember when I first heard about these peculiar cakes. But I do remember thinking that it was such a delightful sounding name – Red Velvet brings to mind the image of a deep burnished hue, and a creamy, luscious texture. Having seen a whole bunch of recipes that differ quite dramatically from each other, I approached The Chin Chai Chef and got the original NY Times recipe that hers was based on. Like her, I decided to go with the Orange-Ginger Cream Cheese Frosting (without omitting the ginger, this time), and the results proved lovely. After all, it’s difficult to fail with orange and chocolate. :)
Red Velvet Cupcakes
(Adapted from the NY Times)
3½ cups cake flour
1/2 cup unsweetened cocoa (not Dutch processed)
1½ tsp salt
2 cups canola oil
2 cups granulated sugar
3 large eggs
3 tbsp red food colouring
1½ tsp vanilla extract
1¼ cup buttermilk
2 tsp baking soda
2½ tsp white vinegar
Preheat oven to 180°C and line your cupcake tray with liners. Whisk flour, cocoa powder, and salt in a bowl. Place oil and sugar in the bowl of your KitchenAid fitted with the paddle attachment and beat at medium speed until well blended. Beat in eggs one at a time, scraping down the sides as necessary.
With the machine on the lowest speed possible, add red food colouring carefully, as it may splash. Add the vanilla, then add the flour mixture in two batches, alternating with the buttermilk. Scrape down the sides of the bowl and beat just long enough to combine.
Place baking soda in a small dish, stir in the vinegar and add to batter with machine running. Beat for 10 additional seconds.
Divide the batter amongst the cupcake liners (I filled mine just over half full – about 55-60g of batter per cupcake), then place in oven and bake for about 20-22 minutes, or until a toothpick inserted into the centre of the cupcake comes out clean. Remove the cakes from the tray and cool on a wire rack completely before frosting.
Orange-Ginger Cream Cheese Frosting
(adapted from a Martha Stewart recipe)
100g unsalted butter, at room temperature
500g cream cheese, at room temperature
100g icing sugar, sifted
finely grated zest of one medium preferably unwaxed orange
1 tsp finely grated, peeled fresh ginger
pinch of salt
In the bowl of your KitchenAid fitted with a paddle attachment, beat butter on medium-high speed until light and fluffy; about 2 minutes. Add cream cheese, beat until well combined and fluffy; another 2 minutes. Scrape down the sides of the bowl and beat for another 30 seconds. Add remaining ingredients and beat for 5 minutes. Frosting can be kept at room temperature, covered with clingfilm, for up to 2 hours.
Yield: 30 Cupcakes and enough cream cheese to frost them all!


Comments are closed.